Touch typing
Touch typing finger placement: home row keys and a finger chart
In touch typing, your left fingers rest on A, S, D and F and your right fingers on J, K, L and ;, with your thumbs over the space bar. Each finger presses the keys above and below its home key, the index fingers also take the two middle columns, and the pinkies cover the edge keys such as Shift, Enter and Backspace.
On this page
What are the home row keys?
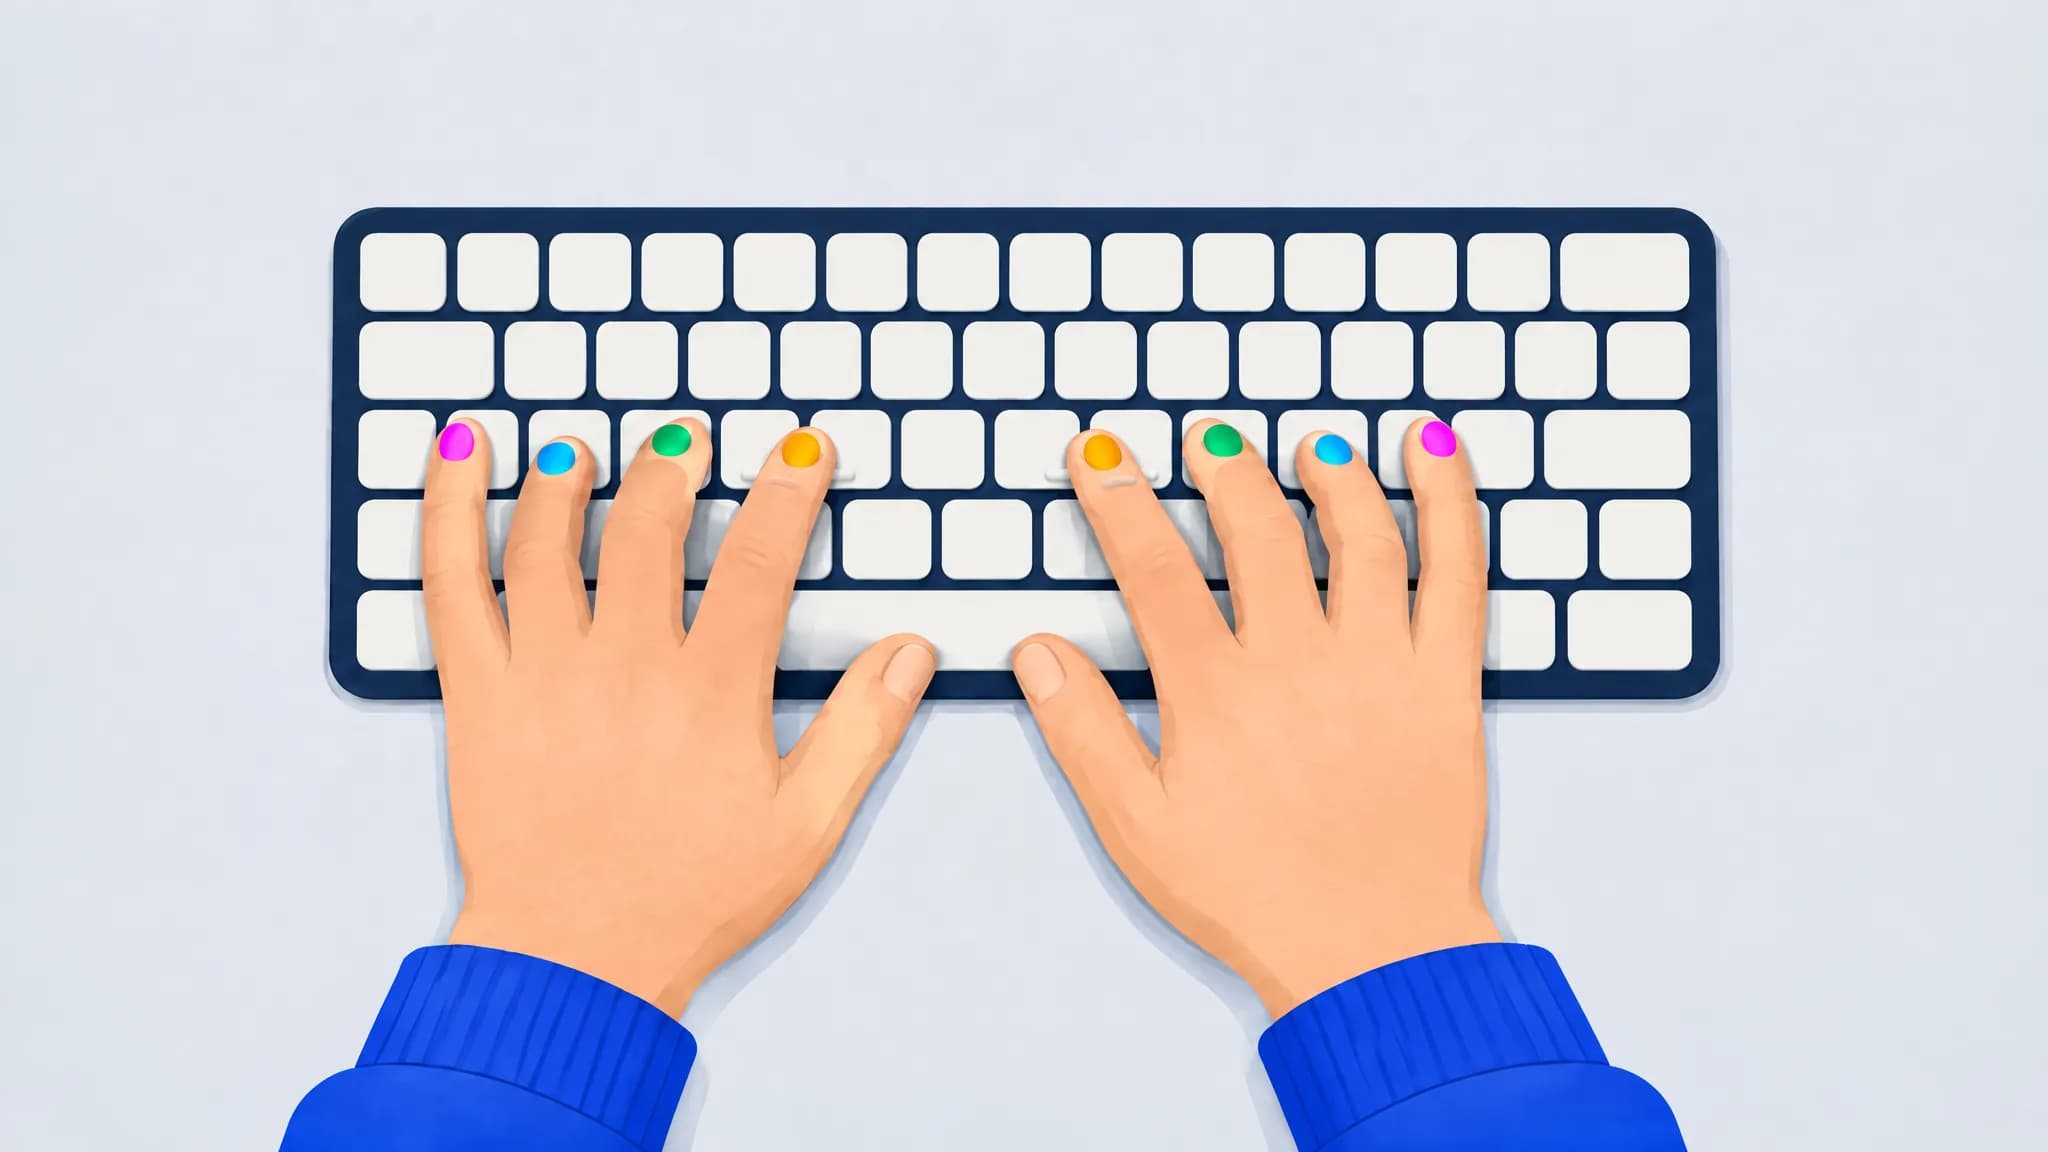
The home row is the middle row of letters. Your fingers rest there between keystrokes and return there after every reach:
- Left hand: pinky on A, ring finger on S, middle finger on D, index finger on F.
- Right hand: index finger on J, middle finger on K, ring finger on L, pinky on ;.
- Thumbs: resting lightly on the space bar.
Most keyboards have a small raised bar or bump on F and J. Put your index fingers on the bumps and the rest of your fingers fall into place, without looking down.
- Pinky
- Ring finger
- Middle finger
- Index finger
- Thumbs (space bar)
- Outlined: home keys
| Finger | Left hand | Right hand |
|---|---|---|
| Pinky | ` 1 Tab Q Caps Lock A (home key) Shift Z | 0 - = Backspace P [ ] \ ; (home key) ' Enter / Shift |
| Ring finger | 2 W S (home key) X | 9 O L (home key) . |
| Middle finger | 3 E D (home key) C | 8 I K (home key) , |
| Index finger | 4 5 R T F (home key) G V B | 6 7 Y U H J (home key) N M |
| Thumbs | space bar with either thumb | |
Which finger presses which key?
Each finger owns a short column of keys that runs through its home key, from the number row down to the bottom row. The rows are staggered, so each column leans slightly: your left index finger’s column is 4 R F V, and your left middle finger’s is 3 E D C.
- Index fingers do the most work. Each covers two columns: the left index takes R, T, F, G, V and B, and the right index takes Y, U, H, J, N and M.
- Middle and ring fingers cover one column each.
- Pinkies cover the outer columns and the edge keys. The left pinky takes Q, A, Z, Tab, Caps Lock and the left Shift. The right pinky takes P, ; and / and every key to their right, including Enter, Backspace and the right Shift.
Charts agree on every letter. A few number and symbol keys vary from course to course, most often 6, which some courses give to the left index finger. Either way works. What matters is choosing one and always using it, for reasons the research below makes clear.
How do you type capitals, Enter and spaces?
- Capital letters: hold Shift with the pinky of the other hand. For a capital A, typed by your left pinky, hold the right Shift with your right pinky. For a capital J, hold the left Shift. That keeps the letter’s own finger free.
- The space bar: press it with either thumb. Use whichever feels natural, and keep the other fingers on the home row while you do.
- Enter and Backspace: reach with your right pinky and come straight back to ;.
- Coming home: after every reach, the finger returns to its home key. That habit is what lets you find the next key by feel.
Does exact finger placement matter?
Less than many courses suggest, as long as you’re consistent. In a motion-capture study of 30 typists, Feit, Weir and Oulasvirta found that trained touch typists used 8.5 fingers on average and self-taught typists 6.2, yet both groups typed at about the same speed: 57.8 and 58.9 words per minute. Three habits predicted speed in both groups:
- using the same finger for a given key every time;
- moving toward the next key before it’s needed;
- keeping the hands still rather than moving them around the keyboard.
Touch typists were more consistent about which finger pressed which key, and they spent half as long looking at the keyboard: 20% of their typing time, against 40% for self-taught typists.
A much larger online study, with 168,960 typists, did find that more fingers went with more speed on average: the fastest 10% reported using 8.4 fingers and the slowest 10% reported 5.3. Its authors suggest the difference in who took part may explain why the two studies disagree. The practical answer is the same either way: the standard chart is a ready-made, consistent finger for every key, and it keeps your hands still and your eyes free.
How should you practice finger placement?
- Start with the home row alone. Words made only of home-row letters, like “flask”, “glad”, “salad” and “half”, let you practice without reaching.
- Add one row at a time: the top row first, then the bottom row, then numbers. Come back to the home row after every reach.
- Go slowly enough to use the right finger every time. Speed comes later; the habit has to come first.
- Look at a chart, not your hands. When you lose a key, check the chart above, or use the keyboard guide in our trainer, which shows the next key and the finger for it, and let it fade as you improve. Our guide to stopping looking at the keyboard explains why to fade that help gradually.
- Practice a little every day. Short sessions beat long ones, as a classic study of trainee typists showed: people who practiced one hour a day learned the keyboard in fewer hours of practice than those who did two 2-hour sessions a day.
What about numbers and the number pad?
On the main keyboard, numbers follow the same columns as the letters below them: each finger reaches up two rows from its home key and comes back. It’s the longest reach on the keyboard, so take numbers slowly at first and keep the other fingers anchored on the home row while one finger reaches.
The number pad on the right of a full-size keyboard has its own home row. Rest your right index finger on 4, middle finger on 5, which usually has a bump of its own, and ring finger on 6. Each finger takes the keys above and below its home key, your thumb takes 0, and your pinky takes Enter and the keys at the right edge. If you enter a lot of numbers, it’s worth learning separately.
How should your hands and wrists sit?
The US Occupational Safety and Health Administration’s guidance on keyboards is a good baseline:
- Keep your wrists straight and in line with your forearms, not bent up, down or to either side.
- Keep your elbows close to your body, at about the height of the keyboard, with your forearms roughly parallel to the floor.
- Keep your shoulders relaxed.
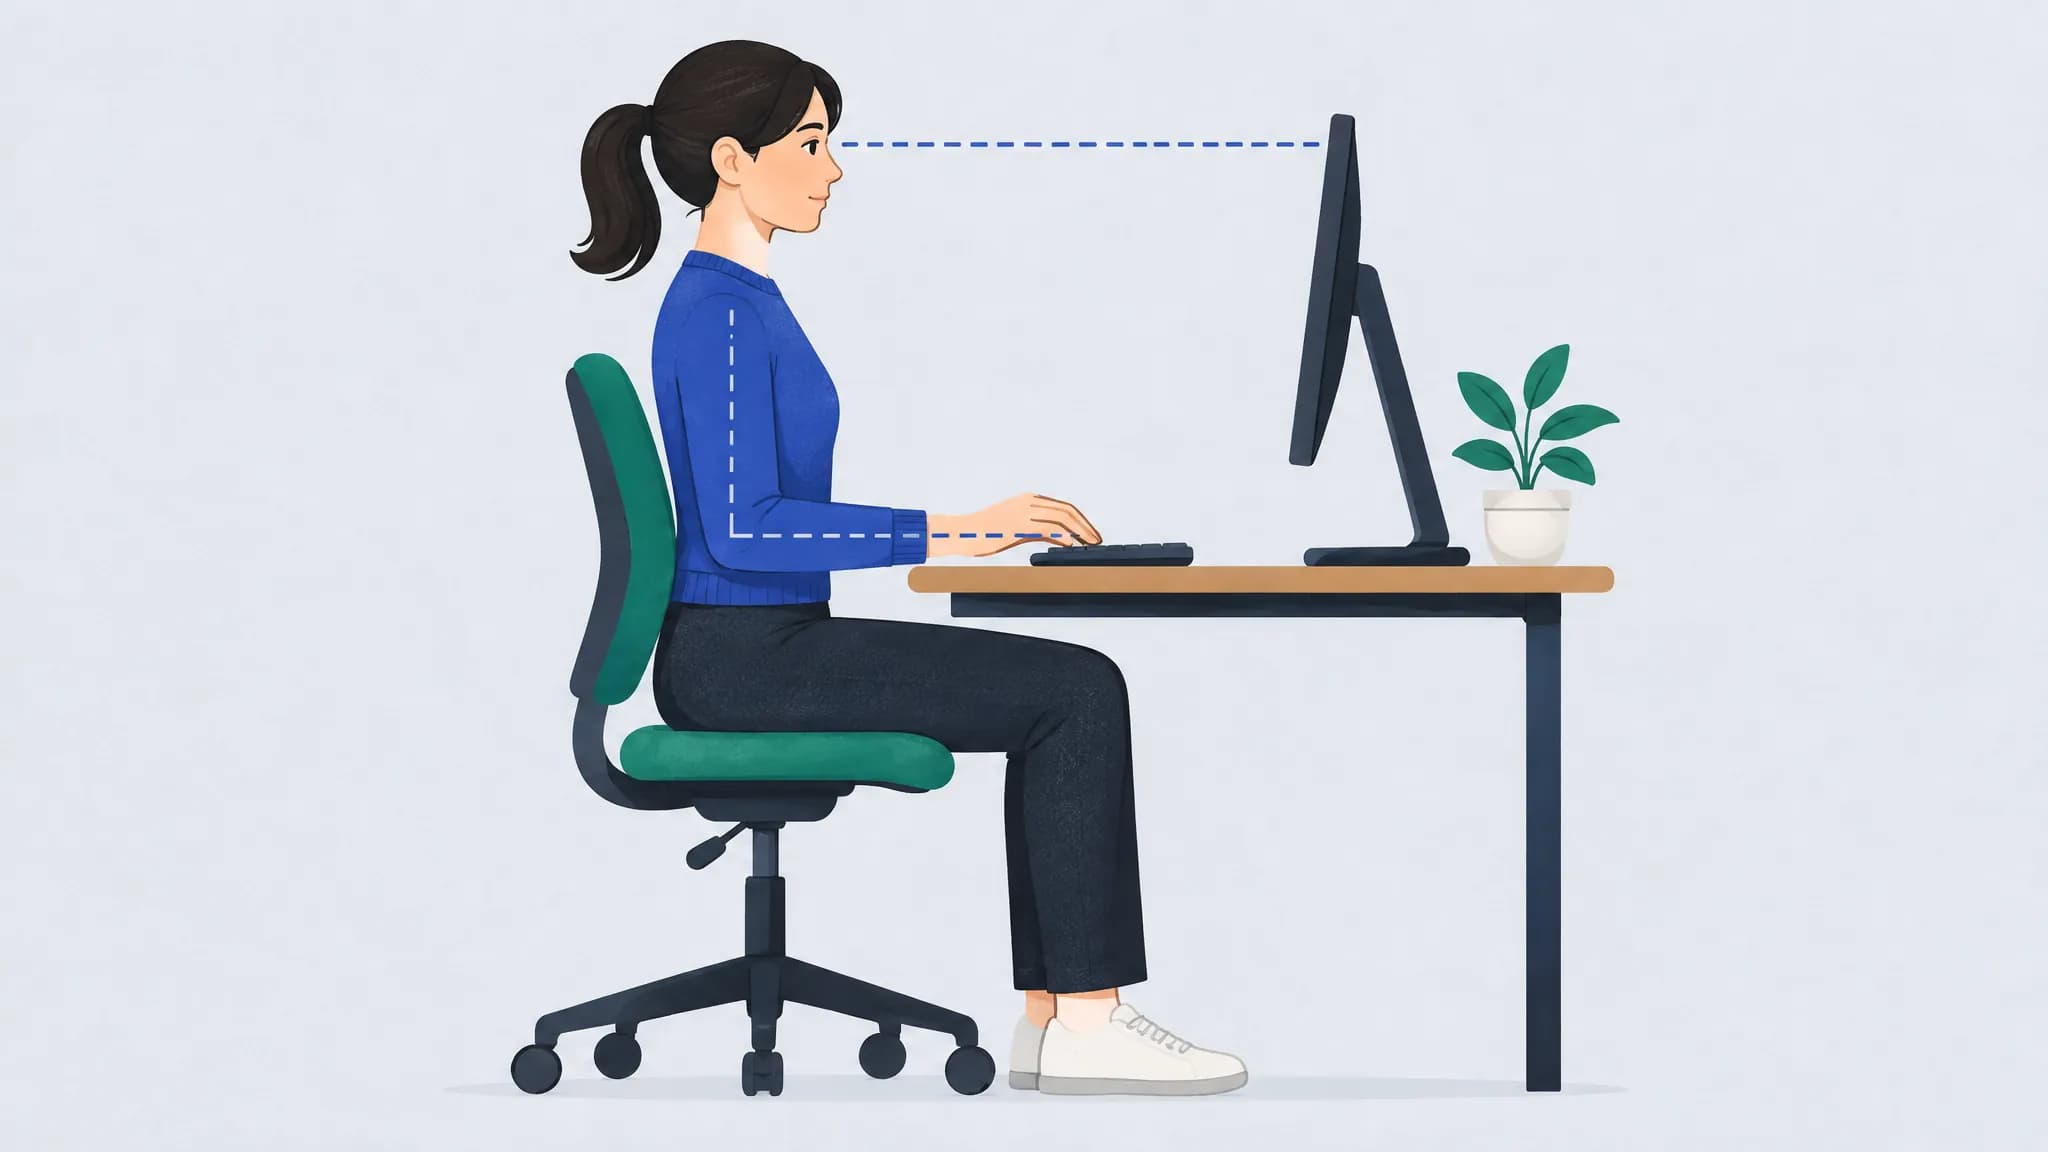
With your hands in that position, your fingers curve naturally over the home row and your thumbs fall onto the space bar.
Frequently asked questions
What are the home row keys?
A, S, D and F for the left hand and J, K, L and ; (semicolon) for the right hand, from pinky to index finger. Your thumbs rest on the space bar.
Why do the F and J keys have bumps?
So you can find the home row by touch. With your index fingers on the bumps, every other finger lands on its home key without you looking at the keyboard.
Which finger types the 6 key?
Most charts give 6 to the right index finger, but some courses teach the left index. Both are fine; use the same finger every time.
Which finger presses the space bar?
Either thumb. Use whichever feels natural; what matters is that the rest of your fingers stay on the home row.
Do I have to use all ten fingers?
No. In the motion-capture study, self-taught typists using about six fingers were as fast as trained touch typists. Using the same finger for each key every time mattered more than the number of fingers. Our guide to two-finger typing vs touch typing covers the trade-offs.
Which finger types B?
In the standard chart, B belongs to the left index finger, since it’s in the left index finger’s second column. Some typists reach it with the right index instead. Either works if you always use the same one.
Sources
- Feit, Weir and Oulasvirta (2016). How We Type: Movement Strategies and Performance in Everyday Typing. CHI 2016.
- Dhakal, Feit, Kristensson and Oulasvirta (2018). Observations on Typing from 136 Million Keystrokes. CHI 2018.
- Baddeley and Longman (1978). The influence of length and frequency of training session on the rate of learning to type. Ergonomics 21(8).
- US Occupational Safety and Health Administration. Computer Workstations eTool: Keyboards.